AirPods Pro: Set Noise Cancellation always on
Do you also always accidentally disable Noise Cancellation? Here’s how to make sure Noise Canceling remains active on AirPods Pro.
One of the biggest annoyances of AirPods Pro is that, often, it is enough to calibrate the touch of your finger badly to accidentally disable the Noise Cancellation. Here’s how to make sure Noise Cancellation is always On.
Noise Cancellation is AirPods Pro’s killer app: when activated, it generates a wave equal to and contrary to that of trains, buzz, various rattles and creates a muffled feeling of silence that is almost unreal; all while the music flows incessantly, isolating us from the hustle and bustle of the world.
It works so well that, in fact, the ideal would be to always keep it active; the problem is that, by default, gestures to control AirPods can interfere with each other. Maybe it happened to you too: a quick touch of the stem starts the music or pauses it; a double tap goes forward, and a triple tap goes back. A long touch, on the other hand, changes modes between Noise Cancellation, Transparency Mode or Deactivated Effects.
And that’s where the donkey falls: often the finger hesitates too much and instead of moving on to the next song, the Noise Cancellation is deactivated; and what is worse, one notices this only after a long time. But luckily there is the solution.
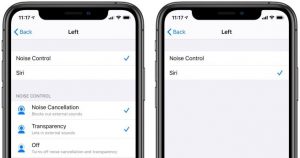
To avoid accidentally turning off Noise Canceling in AirPods Pro, connect them to iPhone, then open Settings> Bluetooth and touch the small “i” to the right of the earbuds. In the “Keep Pressed” section it is possible to set the effect of long pressure independently for each of the earphones: instead of the Noise Control set Siri for both.
From now on, whenever you make a mistake, Siri will activate at most but the Noise Cancellation will remain active. And anyway, as soon as you hear Siri’s sound, remember that you can cancel the request instantly with a further touch.


